The Ultimate Guide to Decadent Chocolate Desserts: From Thousand-Layer Crepes to Foolproof Pudding
Chocolate remains the undisputed sovereign of the dessert world, offering a spectrum of flavors from bitter dark to creamy milk varieties. Creating high-end chocolate desserts at home requires more than just quality cocoa; it demands an understanding of texture, temperature, and patience. In this pillar guide, we break down the complexities of three distinct chocolate masterpieces: the Mille Crepe, the classic pudding, and the cream pie.
The Art of the Chocolate Thousand Layer Crepe (Mille Crepe)
The Chocolate Thousand Layer Crepe, or Mille Crepe, is a feat of patisserie engineering. It consists of dozens of paper-thin chocolate crepes stacked precisely with layers of light, airy chocolate whipped cream. The result is a dessert that offers a “silky sweet temptation” with every forkful, providing a unique mouthfeel that transitions from the slight bite of the crepe to the melt-in-your-mouth cream.
Perfecting the Chocolate Crepe Batter
The foundation of a great Mille Crepe is a batter that produces elastic yet incredibly thin layers. Unlike standard breakfast crepes, these must be delicate enough to stack twenty or thirty high without becoming heavy or rubbery. Key ingredients include cake flour for a lower gluten content, high-quality Dutch-processed cocoa powder, eggs, sugar, and melted butter.
- Resting the Batter: It is imperative to let the batter rest in the refrigerator for at least 1 to 2 hours. This allows the flour to fully hydrate and the air bubbles to dissipate, ensuring the crepes do not tear during the frying process.
- Temperature Control: Use a non-stick pan over medium-low heat. The pan should be lightly brushed with butter only once; the residual fat in the batter should prevent sticking thereafter.
- Consistency: Each crepe should use approximately 2-3 tablespoons of batter, swirled quickly to cover the entire base of the pan.
The Chocolate Cream Filling and Assembly
The filling is typically a stabilized whipped cream or a light pastry cream infused with high-percentage dark chocolate. To assemble, a single crepe is placed on a rotating cake stand, followed by a thin, even layer of cream spread to the very edges. This process is repeated until the desired height is reached. A professional tip is to chill the cake for at least 4 hours before serving; this “sets” the layers, making it possible to cut clean, sharp slices that reveal the stunning internal architecture.

Foolproof Homemade Chocolate Pudding from Scratch
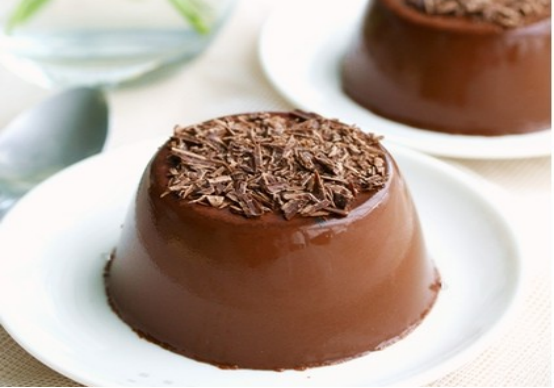
Many home cooks shy away from homemade pudding, fearing lumps or a burnt base. However, a truly “too easy to fail” chocolate pudding relies on a simple ratio of thickener to liquid and constant mechanical agitation. This dessert is a nostalgic staple that, when made with premium ingredients, rivals any high-end chocolate mousse in depth and richness.
The Science of Thickening: Cornstarch vs. Flour
While some recipes use flour, cornstarch is the preferred thickener for a glossy, translucent finish. The starch granules must be whisked into the sugar and cocoa powder while dry to prevent clumping once the liquid is added. This “slurry” method ensures a perfectly smooth texture without the need for straining.
Step-by-Step Cooking Process
The cooking process involves a gradual tempering of the milk and cream into the dry mixture. Once the liquid is incorporated, the mixture is heated over a medium flame while being whisked continuously. The pudding is done when it reaches a “slow bubble”—this indicates the cornstarch has reached its maximum thickening potential and the raw starch taste has been cooked out.
- The Butter Finish: Adding a tablespoon of cold, unsalted butter at the very end adds a professional sheen and a rich mouthfeel.
- Vanilla Enhancement: A splash of pure vanilla extract or a pinch of espresso powder can significantly amplify the chocolate notes without adding their own distinct flavors.
- Preventing Skin Formation: To avoid the tough “skin” that forms on cooling pudding, press a piece of plastic wrap directly onto the surface of the hot liquid before refrigerating.

Crafting the Ultimate Chocolate Cream Pie
The chocolate cream pie is often cited as “the most popular” chocolate dessert in traditional diners and modern bistros alike. It succeeds through the contrast of a crunchy, often salty crust against a dense, fudge-like filling and a cloud of lightly sweetened whipped cream.
The Foundation: Crust Selection
The choice of crust can change the entire profile of the pie. A traditional flaky pastry crust provides a buttery, neutral base, while an Oreo or chocolate wafer crust doubles down on the cocoa intensity. Regardless of the choice, the crust must be “blind baked” or chilled thoroughly to ensure it maintains its structural integrity once the heavy filling is added.
The Custard Filling and Topping
Unlike the lighter pudding mentioned earlier, a chocolate cream pie filling often incorporates egg yolks for a custard-like density. This ensures the pie holds its shape when sliced. The filling is poured into the pre-baked shell while still warm and then chilled until completely firm. The final touch is a generous layer of whipped cream, which should be whipped to stiff peaks just before serving to provide a fresh, airy contrast to the rich chocolate below.
| Dessert Type | Primary Texture | Complexity Level | Best Serving Temperature |
|---|---|---|---|
| Thousand Layer Crepe | Multilayered / Silky | High (Time Intensive) | Chilled (Cold) |
| Chocolate Pudding | Smooth / Velvety | Low (Quick) | Warm or Chilled |
| Chocolate Cream Pie | Dense / Crunchy Base | Medium | Cold |

Advanced Tips for Professional Chocolate Desserts
To elevate these recipes from “home-cooked” to “gourmet,” one must focus on the quality of the chocolate and the precision of the technique. Chocolate is sensitive to heat and moisture; understanding these variables is key to consistency.
Sourcing Ingredients
Always opt for Dutch-processed cocoa powder for a darker color and smoother flavor, as it has been neutralized of its natural acidity. When recipes call for solid chocolate, use couverture chocolate if possible, as it contains a higher percentage of cocoa butter, leading to a superior melt and gloss.
Troubleshooting Common Issues
- Grainy Texture: This usually happens if the sugar hasn’t fully dissolved or if the chocolate has “seized” due to a drop of water. Ensure all equipment is bone-dry.
- Filling Too Runny: For pies and puddings, this is often a result of undercooking the thickener. Ensure the mixture reaches a visible simmer for at least one minute.
- Crepes Tearing: This indicates the batter is too thin or the pan is too hot. Add a tablespoon of flour to the batter or reduce the heat.
Frequently Asked Questions (FAQ)
- Q1: Can I make the Chocolate Thousand Layer Crepe ahead of time?
- Yes, it is actually recommended. The crepe cake needs at least 4-6 hours to set in the refrigerator so the cream can firm up and the flavors can melp. It can be made up to 24 hours in advance.
- Q2: Why did my chocolate pudding turn out lumpy?
- Lumps usually form when the cornstarch is added directly to hot liquid. Always mix your cornstarch with sugar and cocoa powder while dry, then slowly whisk in the cold liquid before turning on the heat.
- Q3: What is the best way to slice a chocolate cream pie cleanly?
- To get a “picture-perfect” slice, use a sharp chef’s knife dipped in hot water and wiped dry between every single cut. The heat from the blade will glide through the dense filling.
- Q4: Can I use milk chocolate instead of dark chocolate in these recipes?
- You can, but keep in mind that milk chocolate is much sweeter and has a lower cocoa content. You may need to reduce the added sugar in the recipe and increase the thickener slightly to account for the different fat-to-solid ratio.
- Q5: How long do these chocolate desserts stay fresh?
- Generally, these desserts are best within 2-3 days when kept in an airtight container in the refrigerator. The crepe cake and pie may start to lose their texture (crepes becoming soggy or crust losing its crunch) after the third day.